Personalized mugs and tumblers are everywhere in 2025—from Etsy shops to TikTok tutorials to corporate branding campaigns. They’ve become a symbol of individuality and creativity, allowing people to express themselves through everyday drinkware.

But what makes this trend so exciting is that anyone can do it. With the right digital designs, a printer, and a mug press, you can create custom mugs for personal gifts or start a small side hustle selling your creations.
In this guide, we’ll cover everything you need to know about personalizing mugs and tumblers with digital designs:
- Tools and materials
- Choosing the right clip art files
- Step-by-step design and sublimation process
- Creative project ideas
- Mistakes to avoid
- How to turn this hobby into a business
By the end, you’ll be ready to create mugs that not only look professional but also stand out as meaningful, personalized items.
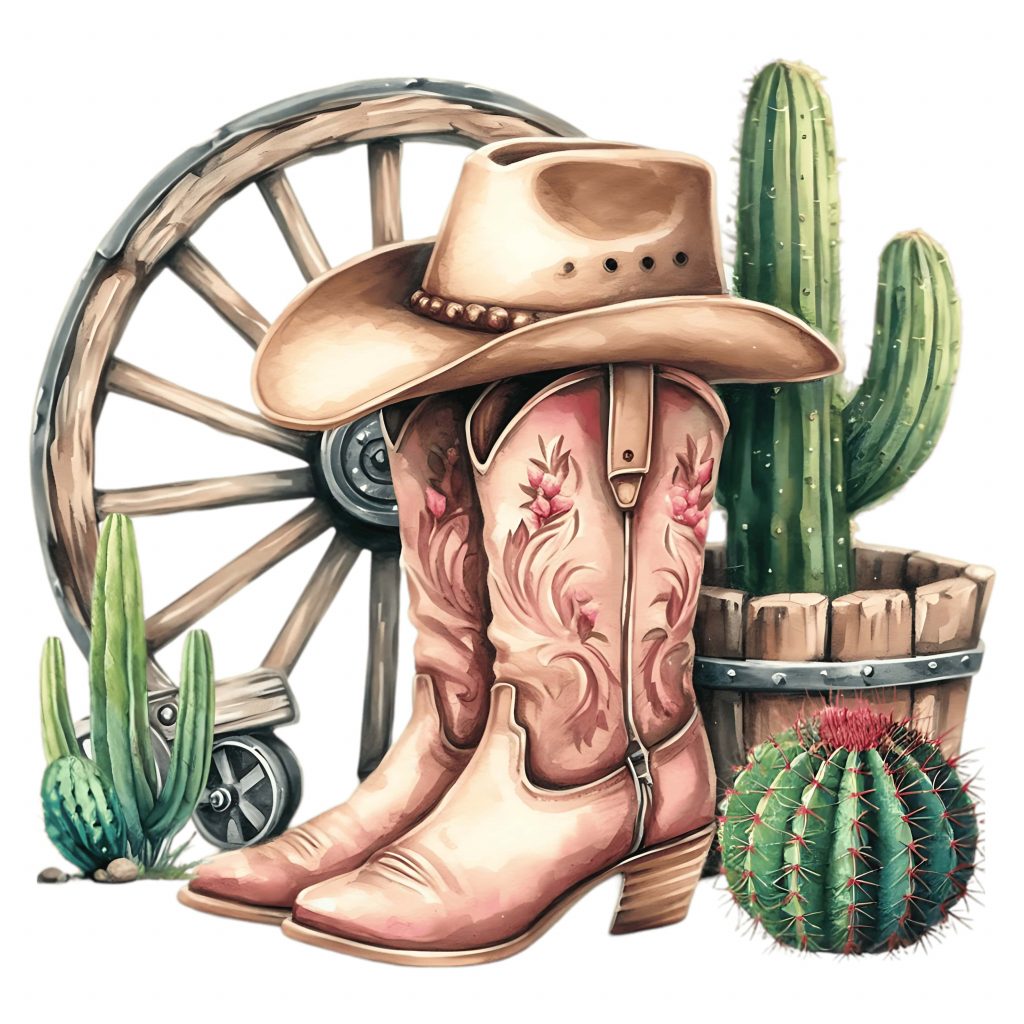
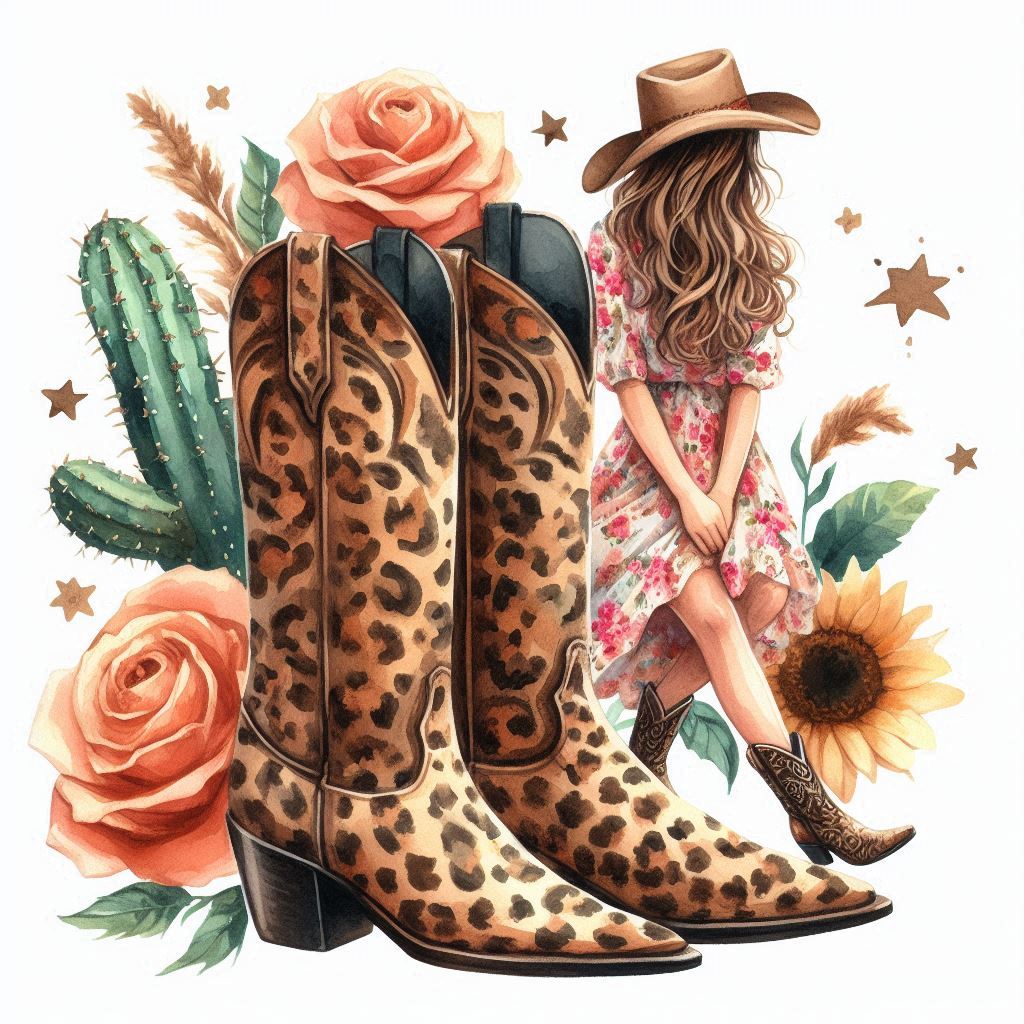
👉 Start exploring with our Watercolor Clip Art Collection.
1. Why Personalized Mugs and Tumblers Are So Popular

In today’s world of mass production, people are constantly searching for ways to stand out and add a personal touch to their everyday lives. This is especially true with items we use daily—like mugs and tumblers. Something as simple as a coffee cup can transform into a cherished keepsake, a meaningful gift, or a brand statement when personalized with unique digital designs. Let’s explore why custom mugs and tumblers have become such a global trend, and why they’re the perfect DIY project for crafters and entrepreneurs alike.
The Emotional Value of Custom Gifts
At their core, personalized mugs and tumblers are more than just drinkware—they’re expressions of identity and affection. Giving someone a mug with their name, favorite quote, or even a watercolor illustration of their pet shows thoughtfulness that a store-bought product simply can’t match.
For example:
- A father receives a tumbler with his children’s drawings printed on it.
- A couple exchanges matching mugs with custom wedding dates.
- A teacher is gifted a personalized “Best Teacher Ever” mug filled with chocolates.
These gifts aren’t about the mug itself; they’re about the meaning behind it. Every time the recipient uses that mug, they’re reminded of the giver and the occasion. That emotional connection is what makes personalization so powerful.
Perfect for Events and Celebrations

Events are one of the largest drivers of the custom mug and tumbler market. Weddings, birthdays, anniversaries, graduations, and holidays are all opportunities where personalized drinkware shines.
- Weddings: Couples often design mugs for their bridal party or create custom tumblers as wedding favors.
- Birthdays: A birthday mug with age, name, and a fun design makes a lasting keepsake.
- Corporate Events: Businesses hand out branded tumblers at trade shows or retreats.
- Seasonal Holidays: Christmas mugs with festive designs or Valentine’s Day tumblers with hearts are huge sellers.
These events create a constant demand for new, seasonal, and themed designs, which is why crafters and businesses who specialize in personalized drinkware can thrive year-round.
Corporate Branding Opportunities
It’s not just individuals and families driving this trend—businesses love personalized mugs and tumblers as part of their branding strategy. A custom mug on an employee’s desk or a tumbler in a client’s hand is essentially walking advertising.

Benefits for businesses include:
- Brand visibility: Logos on mugs used daily at work or at home keep the brand top of mind.
- Affordable marketing: Compared to billboards or ads, branded mugs are cheap but long-lasting.
- Employee gifts: Companies use personalized tumblers to boost morale or celebrate milestones.
Small business owners also use mugs as part of their identity. For example, a bakery could sell tumblers featuring its logo and illustrations of baked goods. Not only does this spread brand awareness, but it also creates another revenue stream.
Affordable Entry into DIY Crafting
One of the biggest reasons mugs and tumblers are popular is that they’re affordable to make. Unlike large crafting projects that require specialized machines, mug personalization can start with a modest setup.
For under $200, a beginner can purchase:
- Blank mugs or tumblers.
- Transfer paper or vinyl.
- Access to free design software like Canva.

With this small investment, someone can start producing beautiful personalized items at home. For those who want to go further, advanced sublimation printers and mug presses open up even more possibilities—but the fact that mugs are inexpensive and accessible makes them the ideal entry-level project for DIY crafters.
Case Example: Emma’s Etsy Success Story
To see the potential of personalized mugs in action, let’s look at the example of Emma, a UK-based crafter. In 2023, Emma decided to turn her hobby of creating digital designs into a small business. With just $200 in startup costs, she purchased a mug press, sublimation paper, and a few sets of watercolor clip art.
She opened an Etsy shop selling personalized mugs with floral and seasonal designs. Within 12 months, Emma had sold over 500 mugs to customers across Europe and the US. What started as a hobby became a side income stream that paid for her family holidays.
Emma’s story highlights why mugs are such a popular product: they’re low-cost to make, high in demand, and deeply meaningful to customers.
2. Tools and Materials You’ll Need
Before you can start creating personalized mugs and tumblers, you’ll need the right tools and materials. The good news? You don’t need a massive budget to begin. In fact, many beginners start with a simple setup that costs less than a weekend getaway. As your skills and business grow, you can invest in more advanced equipment to scale up production. Let’s break down what you’ll need, from software and hardware to materials and safety tips.
Beginner vs. Advanced Setup
One of the biggest advantages of mug and tumbler personalization is that it’s flexible. You can start small or go all in, depending on your goals.
Beginner Setup (Budget-Friendly, ~$200–$300):
- Free or low-cost design software (like Canva).
- A regular inkjet printer with transfer paper (not sublimation quality, but good for vinyl designs).
- A basic mug press or even iron-on transfer sheets.
- A small pack of blank mugs and tumblers.
This setup is ideal if you’re just making mugs for friends, family, or as hobby gifts.
Advanced Setup (Professional, ~$800–$1,200):
- Sublimation printer (Epson EcoTank or Sawgrass are popular).
- Sublimation ink and paper.
- High-quality mug press or multifunction heat press.
- Cricut or Silhouette cutting machine for vinyl transfers.
- Larger stock of blank mugs and tumblers (bulk pricing saves money).
This advanced setup is perfect for anyone who wants to sell mugs on Etsy, Shopify, or at craft fairs, as it produces long-lasting, professional results.
Software: Design Tools You’ll Use
To create digital designs for mugs and tumblers, you’ll need software to arrange your clip art, add text, and adjust sizes. Thankfully, there are many options:
- Canva (Beginner-Friendly): Free online tool, drag-and-drop interface, perfect for simple designs.
- Adobe Photoshop (Professional): Industry standard, powerful tools for image editing, best for advanced users.
- Procreate (For iPad): Popular among artists, allows hand-drawn designs and custom illustrations.
- GIMP (Free Alternative): Open-source version of Photoshop, powerful and free.
👉 For most beginners, Canva is enough. As you grow, investing in Photoshop or Procreate will give you more creative freedom.
Hardware: Machines and Devices
Here’s what you’ll need on the hardware side:
- Printer: A sublimation printer is highly recommended for professional-quality results. Sublimation prints designs directly into the surface of the mug, making them dishwasher- and microwave-safe. Epson EcoTank printers are a popular choice for conversion, while Sawgrass printers are made specifically for sublimation.
- Mug Press: This machine applies heat and pressure to transfer your design onto the mug. Basic single-mug presses cost under $150, while multifunction presses (for mugs, shirts, hats, etc.) cost $300+.
- Cutting Machine (Optional): If you plan to work with vinyl designs instead of sublimation, a Cricut or Silhouette machine will cut vinyl precisely to fit your mug or tumbler.
Materials: What You’ll Work With
- Sublimation Paper: Special paper designed to hold sublimation ink and release it onto the mug when heated.
- Sublimation Ink: Long-lasting ink that bonds with the mug coating.
- Heat-Resistant Tape: Keeps your transfer in place during pressing.
- Blank Mugs and Tumblers: Choose mugs coated for sublimation or stainless-steel tumblers designed for heat transfers.
- Vinyl Sheets (Optional): For Cricut-based designs instead of sublimation.

Safety Tips and Workspace Setup
Safety is just as important as creativity:
- Ventilation: Always use heat presses in a well-ventilated area.
- Protective Gear: Heat-resistant gloves protect your hands when handling hot mugs.
- Workspace: Dedicate a sturdy table for your printer and press. Keep materials organized to avoid mistakes.
Cost Comparison: Beginner vs. Pro Setup
| Item | Beginner Setup | Advanced Setup |
|---|---|---|
| Design Software | Canva (Free) | Photoshop ($20/mo) or Procreate ($10 one-time) |
| Printer | Regular Inkjet (~$100) | Sublimation Printer ($300–$600) |
| Heat Transfer | Iron-On Sheets (~$20) | Mug Press ($150–$300) |
| Cutting Machine | Not Required | Cricut (~$250) |
| Materials (starter pack) | $50–$100 | $100–$200 bulk |
Total Investment:
- Beginner: ~$200–$300
- Advanced: ~$800–$1,200
3. Choosing the Right Digital Designs
When it comes to personalizing mugs and tumblers, your designs are the star of the show. A great printer or heat press can give you professional results, but if your digital artwork isn’t high-quality, the final product will look blurry, stretched, or unprofessional. Choosing the right clip art and digital files is one of the most important steps in the customization process.

Understanding File Formats: PNG, SVG, and JPG
Not all image files are created equal. Each file format serves a different purpose, and knowing which one to use will save you time, money, and frustration.
- PNG (Portable Network Graphics):
This is the gold standard for mug and tumbler designs. PNG files support transparent backgrounds, which means you can easily layer them over different colors without having a white box around your design. They also support high resolution, which is essential for crisp prints.
👉 Best for: Clip art, watercolor illustrations, text overlays. - SVG (Scalable Vector Graphics):
SVG files are vector-based, meaning they can be resized infinitely without losing quality. While sublimation relies mostly on PNGs, SVGs are incredibly useful if you’re using a Cricut or Silhouette cutting machine for vinyl designs.
👉 Best for: Vinyl lettering, simple icons, logos. - JPG (Joint Photographic Experts Group):
JPGs are compressed image files and don’t support transparency. They’re great for photos but not ideal for designs that need clean edges. Still, they can be used if your design doesn’t require a transparent background.
👉 Best for: Photographic prints, full background designs.
Pro Tip: If you’re selling mugs online, always list the formats included with your digital designs—customers love flexibility.
Resolution: Why 300 DPI Matters
One of the biggest mistakes beginners make is using low-resolution images. A design that looks sharp on your phone might print poorly on a mug if it’s not high enough resolution.

- DPI (Dots Per Inch): For printing, your files should be at least 300 DPI. This ensures that even small details remain crisp after printing.
- Image Size: Always check the pixel dimensions. For mugs, you’ll want designs at least 2,500 × 1,000 pixels to cover the printable area.
Using high-resolution files prevents pixelation and keeps your products looking professional—customers can immediately tell the difference.
Licensing: Personal vs. Commercial Use
When working with digital designs, it’s crucial to respect copyright and licensing terms.
- Personal License: You can use the design for yourself or as a gift but cannot sell items created with it.
- Commercial License: Allows you to sell products made with the design. Most marketplaces (like Etsy) require sellers to use only designs that have proper commercial rights.
👉 Always double-check the license before selling. At TumblersGalaxy, our Refund & Licensing Policy clearly explains what’s allowed for both free and paid clip art.
Example: If you download a free floral PNG for your personal use, you can make a mug for your mom’s birthday. But if you want to sell that same mug in your Etsy shop, you’ll need a commercial license.
Showcase: TumblersGalaxy Clip Art Examples

Here are some categories from TumblersGalaxy that work beautifully for mugs and tumblers:
- Floral Sets: Perfect for weddings, birthdays, and Mother’s Day gifts. A simple watercolor flower wreath around a quote looks elegant and timeless.
- Pet Illustrations: Custom pet mugs are a best-seller on Etsy. Our watercolor cat and dog clip art collections are great for animal lovers.
- Seasonal Packs: From Christmas wreaths to Halloween pumpkins, seasonal designs are guaranteed to sell year-round.
- Abstract Watercolor Textures: These can be used as full mug wraps or backgrounds for quotes.
Each of these collections comes in high-resolution PNG format, ensuring your designs look sharp and professional.
Tips for Picking the Right Designs
- Always start with a theme (e.g., wedding, pet, seasonal).
- Choose colors that complement the mug or tumbler material.
- Keep designs simple—mugs have a small canvas, so less is often more.
- Download bundles to save money and have a wider variety of designs on hand.

4. Step-by-Step: Designing Your Mug or Tumbler
Designing your own mug or tumbler might sound intimidating at first, but it’s surprisingly straightforward once you know the steps. With the right software, clip art, and a few tricks, you can create stunning designs that look professional—even if you’re a beginner. In this section, we’ll walk through the entire design process, from setting up your canvas to exporting the final file for printing.
Step 1: Set Up Your Canvas Size
Before you start placing clip art, you need to create a design canvas that matches the size of your mug or tumbler.
- Standard 11 oz mug: 8.5″ × 3.5″ (2,550 × 1,050 pixels at 300 DPI).
- 15 oz mug: 9″ × 4″ (2,700 × 1,200 pixels).
- 20 oz tumbler: 9.3″ × 8.2″ (2,800 × 2,460 pixels).
Most design programs (Canva, Photoshop, GIMP, Procreate) allow you to set custom dimensions. Working with the correct canvas size ensures your design wraps properly around the mug and avoids cropping.
👉 Pro Tip: If you’re selling mugs, create templates for common sizes so you don’t have to reset dimensions every time.

Step 2: Import Your Clip Art
Once your canvas is ready, import your clip art files. PNGs with transparent backgrounds work best because they can be layered over any color or texture.
In Photoshop or Canva:
- Drag and drop your PNG file onto the canvas.
- Resize it while holding the shift key to avoid distortion.
- Place the clip art strategically—centered for a main design, or repeated for a pattern wrap.
If you’re designing with TumblersGalaxy watercolor clip art, try combining floral elements with text or pairing seasonal icons with backgrounds for a cohesive look.
Step 3: Add Text or Branding
Text elevates your design from “just an image” to something personal or marketable. Popular options include:
- Quotes and sayings (inspirational, funny, or seasonal).
- Names or initials for personalized gifts.
- Logos for business branding.
Font choice matters here:
- Script fonts pair beautifully with watercolor florals.
- Bold sans-serifs work well for modern, minimalist designs.
- Handwritten fonts create a casual, fun vibe.
👉 Pro Tip: Keep text legible! Use high contrast between font color and background.
Step 4: Use Mockups to Preview
Before printing, preview your design using mockups. A mockup is a digital image of a blank mug or tumbler where you can overlay your design to see how it looks in real life.
- Canva and Placeit offer ready-made mockup templates.
- Photoshop users can use Smart Objects for realistic previews.
- Many Etsy sellers use mockups to showcase designs before printing physical samples.
Mockups save time, reduce wasted materials, and help you catch alignment issues before committing to a print.
Step 5: Export for Print
When you’re happy with your design, it’s time to export it:
- File type: PNG (for sublimation printing) or SVG (for Cricut vinyl).
- Resolution: 300 DPI minimum.
- Color mode: Use RGB for design software, but your sublimation printer will convert it to the correct print profile.
Always double-check that your design is mirrored (flipped horizontally) before printing—especially for sublimation. This ensures the image transfers correctly when pressed.
Step 6 (Optional): Create Variations
If you plan to sell your mugs or tumblers, consider creating multiple variations of a single design. For example:
- A floral wreath mug with the quote “Good Morning.”
- The same wreath design but with “Best Mom Ever.”
- A blank wreath design customers can customize.
Offering variations helps attract more customers and gives you more to showcase in your shop or portfolio.
Practical Example
Let’s say you want to create a Christmas tumbler:
- Open a 9.3″ × 8.2″ canvas.
- Import TumblersGalaxy watercolor clip art (snowflakes + Christmas wreath).
- Add the text “Merry & Bright” in a bold, festive font.
- Use a mockup to preview the design on a stainless steel tumbler.
- Export as a high-resolution PNG, mirrored for sublimation.
In less than an hour, you’ll have a professional-quality design ready to print or sell.
5. Printing and Transferring the Design

Designing your mug or tumbler digitally is exciting, but the magic really happens when that design is transferred onto a physical product. There are several methods for doing this, but sublimation and vinyl transfer are the most popular. In this section, we’ll explain sublimation in detail, highlight common issues to watch for, and give you alternatives if you don’t have sublimation equipment.
What Is Sublimation Printing?
Sublimation is a process where heat and pressure turn special ink into gas, bonding it permanently with the coating on a mug or tumbler. Unlike vinyl stickers that sit on top of the surface, sublimation actually fuses the design into the mug’s material.
Why sublimation is popular:
- Produces vibrant, long-lasting colors.
- Designs are dishwasher- and microwave-safe.
- No peeling, cracking, or fading.
- Ideal for both hobby and professional use.
Step-by-Step: Sublimation Printing Process
Here’s a simple guide to printing your design onto a mug or tumbler using sublimation:

- Prepare Your Design
Export your design at 300 DPI as a mirrored PNG file. Use sublimation software (often bundled with your printer) to adjust color profiles. - Print Your Design
Print on sublimation paper using sublimation ink. Regular ink won’t work because it won’t transfer properly. - Wrap the Design
Cut your design to size and wrap it around the mug or tumbler. Secure it tightly with heat-resistant tape to prevent shifting. - Heat Press
Place the mug into your heat press.- Standard 11 oz mug: 375–400°F (190–205°C) for 4–6 minutes.
- Tumblers: 350–375°F (175–190°C) for 5–7 minutes, rotating halfway if your press doesn’t do it automatically.
- Cool and Reveal
Remove the mug carefully (use heat-resistant gloves). Peel off the sublimation paper and tape to reveal the design. Let it cool fully before handling.
Common Issues and How to Fix Them
Even experienced crafters run into problems when sublimating mugs. Here are some of the most frequent issues:
- Ghosting (faint duplicate image): Happens if the paper shifts during pressing. Fix: Use more heat tape and ensure tight wrapping.
- Faded colors: Usually caused by low temperature, insufficient pressure, or incorrect sublimation ink. Fix: Check your press settings and ink brand.
- Blurry or pixelated designs: The design resolution is too low. Fix: Always use 300 DPI images.
- Uneven transfer: Sometimes caused by poor-quality blank mugs or tumblers. Fix: Buy sublimation-coated blanks from trusted suppliers.
👉 Pro Tip: Always run a test print before producing in bulk. This helps fine-tune your press settings.
Alternatives: Vinyl Transfers (Cricut or Silhouette)
If you don’t have sublimation equipment, you can still personalize mugs using vinyl designs.
How it works:
- Cut your design on adhesive vinyl with a Cricut or Silhouette.
- Weed (remove excess vinyl).
- Apply transfer tape and place the vinyl on the mug.
- Smooth it down and peel off the tape.
Pros:
- No special printer or sublimation blanks required.
- Works on any smooth-surfaced mug.
Cons:
- Not dishwasher safe unless sealed.
- Vinyl may peel over time with heavy use.
Vinyl is great for simple, bold designs like text or logos, while sublimation excels at full-color images like watercolor clip art.
Time and Temperature Guide
Here’s a quick cheat sheet for common blanks:
| Product | Temp (°F) | Time (min) | Pressure |
|---|---|---|---|
| 11 oz mug | 375–400 | 4–6 | Medium |
| 15 oz mug | 375–400 | 5–7 | Medium |
| 20 oz tumbler | 350–375 | 5–7 | Medium |
| Stainless steel | 325–350 | 5–6 | Firm |
Always check manufacturer guidelines for your blanks, as coatings may vary.
Safety Tips
- Always wear heat-resistant gloves when removing mugs from the press.
- Keep your press on a stable, heat-resistant surface.
- Work in a ventilated area to avoid fumes from sublimation inks.
6. Creative Ideas for Custom Mugs and Tumblers
One of the best parts about working with mugs and tumblers is how versatile they are. A blank mug is like a canvas—you can turn it into a gift, a business tool, or even a seasonal collectible with just a little creativity. In this section, we’ll explore different types of design ideas you can try, whether you’re crafting for personal use, making gifts for loved ones, or selling mugs in your shop.
Gift Ideas: Teachers, Parents, Weddings, and More
Personalized mugs and tumblers make excellent gifts because they’re both practical and meaningful. Unlike generic store-bought items, they carry a personal touch that shows effort and thought.
- Teachers: A mug with a watercolor apple illustration and “Best Teacher Ever” text is a classic, but you can also get creative with custom class names or inside jokes.
- Parents: “Mom Fuel” or “World’s Best Dad” paired with floral or fun clip art designs makes for daily reminders of love.
- Weddings: Bridal parties often receive custom tumblers with names, roles (bridesmaid, maid of honor), or wedding dates. These double as gifts and memorable keepsakes.
- Friends: Funny quote mugs (“But first, coffee”) or inside-joke designs can make any friend smile.
👉 Tip: When making gift mugs, focus on personalization—names, initials, and specific occasions.
Seasonal Themes That Sell Year-Round
Seasonal mugs are some of the best-selling products on platforms like Etsy. Customers love updating their drinkware to match the holidays.
- Christmas: Watercolor snowflakes, Santa hats, or a cozy “Merry & Bright” design.
- Valentine’s Day: Hearts, romantic quotes, and pastel floral art.
- Halloween: Pumpkins, bats, ghosts, or humorous “Witch’s Brew” mugs.
- Easter: Bunny illustrations, pastel eggs, and cheerful seasonal patterns.
- Summer: Tropical leaves, beach clip art, and refreshing lemonade quotes.
By creating collections of seasonal mugs, you’ll have reasons to promote and sell all year long.
Corporate Branding and Merchandise
Businesses love personalized mugs and tumblers for branding and giveaways. They’re practical, affordable, and used every day, which keeps logos in constant view.
- Company Logos: Print the logo on one side and a motivational slogan on the other.
- Employee Gifts: Personalized tumblers with staff names are great for team spirit.
- Promotional Giveaways: Trade shows and conferences often hand out branded mugs as swag.
If you run a small business, mugs with your logo can also become part of your merchandise line—customers love to buy functional items that connect them to brands they enjoy.
Unique Niches: Pet Mugs, Hobbies, and Collectibles
To stand out in the crowded custom mug market, focus on specific niches:
- Pet Lovers: Offer custom mugs with dog or cat illustrations paired with pet names. Watercolor pet portraits are especially popular.
- Hobbies: Fishing mugs (“Hooked on Coffee”), gamer mugs with controller clip art, or gardener mugs with floral designs.
- Collectibles: Create series-based mugs (e.g., “Zodiac Sign Collection” or “Floral Birth Month Mugs”). Customers love to buy them as sets.
👉 Pro Tip: Niche designs are perfect for SEO. For example, a “Yoga Lover Mug” might get fewer searches than “Coffee Mug,” but it will attract more targeted buyers.
Photo + Clip Art Combos

Combining customer photos with clip art adds an extra layer of personalization. For instance:
- A pet photo surrounded by a watercolor floral frame.
- A family portrait with a seasonal background.
- A vacation photo overlaid with travel-themed clip art.
This type of design is highly personal and often commands a higher price point because it feels more bespoke.
Bundle Sets and Themed Collections
Another creative approach is to design mugs as part of a set:
- A “Couples Mug Set” where one mug says “Mr.” and the other says “Mrs.” with matching clip art.
- A “Holiday Collection” with four mugs representing different holidays.
- A “Color Theme Pack” where each mug has a similar design but in a different color.
Bundling increases the perceived value and encourages customers to purchase multiple mugs instead of just one.
7. Common Mistakes to Avoid

Even with the best clip art, printers, and presses, mistakes can still happen when creating personalized mugs and tumblers. The good news? Most of these errors are easy to avoid once you know what to look out for. In this section, we’ll explore some of the most common mistakes beginners make, why they happen, and how you can prevent them.
1. Using Low-Resolution Files
One of the fastest ways to ruin a mug design is by using a low-quality image. What might look fine on your phone screen can become blurry, pixelated, or stretched when printed.
Why it happens: Many beginners download images from free sources that aren’t sized for printing, or they resize a small file too much.
How to fix it:
- Always use designs at 300 DPI resolution.
- For mugs, aim for files at least 2,500 × 1,000 pixels.
- Stick to professional clip art collections (like TumblersGalaxy) instead of random Google images.
👉 Remember: High-quality in = high-quality out.
2. Forgetting to Mirror Your Design
If you’re using sublimation, forgetting to flip your design horizontally is a very common mistake. When the paper is pressed onto the mug, the design transfers in reverse.
Why it happens: Beginners export their files without checking the mirror setting.
How to fix it:
- Always select “Mirror” or “Flip Horizontal” in your print settings.
- Create a checklist for your workflow so you don’t forget this crucial step.
3. Using the Wrong Mug or Coating
Not every mug can be used for sublimation. Only mugs with a polymer coating are compatible with sublimation inks. Using a regular ceramic mug without coating will result in faded, incomplete transfers.
How to fix it:
- Purchase sublimation-ready mugs from trusted suppliers.
- For tumblers, make sure they’re labeled as sublimation blanks.
👉 If you’re working with vinyl instead of sublimation, almost any smooth mug will work, but sublimation requires the special coating.
4. Overheating or Underheating in the Press
Heat and pressure need to be just right for sublimation. If your press is too hot or too cold, your design won’t transfer properly.
Common results:
- Overheating: Colors look burnt, brownish, or faded.
- Underheating: Colors look too light or don’t transfer fully.
How to fix it:
- Follow the manufacturer’s temperature and time guidelines for your blanks.
- Standard mugs: 375–400°F (190–205°C) for 4–6 minutes.
- Always run a test mug before bulk production.
5. Skipping Licensing Rules
Many people unknowingly violate copyright laws by using images they don’t have the rights to. Selling mugs with unlicensed art can lead to shop closures, legal problems, and loss of credibility.
How to fix it:
- Use only clip art that comes with a commercial license.
- Check each seller’s terms—personal-use designs cannot be resold.
- Review TumblersGalaxy’s Refund & Licensing Policy for clarity.
👉 Pro Tip: Always keep a record of your licenses in case you need to show proof of rights.
6. Poor Alignment of Designs
Another mistake is placing the design too high, too low, or unevenly on the mug. Even a beautiful design can look amateur if it’s off-center.
How to fix it:
- Use mug templates to position artwork correctly.
- Mark your blanks with light guides before pressing.
- Practice with test prints to perfect placement.
7. Not Testing Before Selling
Some crafters jump straight into selling mugs without thoroughly testing their process. This often leads to negative customer reviews when designs peel, fade, or look poor.
How to fix it:
- Always test new designs, blanks, and settings before selling.
- Keep a “sample shelf” of your tests to review durability over time.
8. Business Potential: Turning a Hobby into Income
For many people, personalizing mugs and tumblers begins as a fun hobby—something creative to do on weekends or as gifts for friends. But what starts with a single mug press in the kitchen can quickly grow into a profitable side hustle, or even a full-time business. The demand for personalized drinkware is massive, and with the right strategy, you can tap into this thriving market.
Why Custom Mugs and Tumblers Sell
- Everyday use: Coffee mugs and tumblers are practical, used daily by millions of people.
- Emotional value: Personalization adds meaning—customers feel connected to items that reflect their identity.
- Constant demand: Birthdays, weddings, holidays, corporate events—there’s always an occasion for custom drinkware.
- Affordable luxury: At $15–25 per mug, they’re inexpensive enough for customers to buy on impulse but profitable enough for sellers to earn a good margin.
Where to Sell: Platforms and Venues
There are multiple ways to turn your creations into cash:
- Etsy: The most popular platform for handmade and custom goods. Personalized mugs are a top seller year-round.
- Shopify: Great for building your own branded store once you’re ready to scale.
- Amazon Handmade: Access to a huge audience with Prime shipping.
- Local Craft Fairs: Perfect for connecting with your community and testing which designs sell best.
- Social Media Shops: Instagram and Facebook now allow you to list and sell products directly.
👉 Start small on Etsy or craft fairs, then expand to Shopify or Amazon once you’ve built demand.
Pricing Strategies
Pricing your mugs correctly is key to profitability. Here’s a basic breakdown:
- Cost of production: $3–$5 for a blank mug + $1–$2 for ink/paper + $0.50 for packaging.
- Average selling price: $15–$25, depending on design complexity and customization.
- Profit margin: $8–$15 per mug.
Tips for pricing:
- Offer discounts for bundles (e.g., “Buy 2, Save 10%”).
- Charge extra for personalization (names, photos, custom requests).
- Research your competitors on Etsy to see what’s trending and at what price.
Marketing Your Mug Business
Creating great products is only half the battle—you also need to market them effectively.
- Instagram & Pinterest: Perfect for visual marketing. Share mockups, behind-the-scenes videos, and seasonal promotions.
- TikTok: Quick craft tutorials or “watch me make this mug” videos often go viral.
- Email Marketing: Offer a discount code for first-time subscribers to grow a loyal customer base.
- SEO: Use long-tail keywords like “personalized dog mom mug” instead of just “coffee mug” to rank in searches.
👉 Consistency matters. Post regularly, use hashtags, and engage with your community.
Building Seasonal Product Lines
One of the smartest ways to ensure steady sales is to create seasonal collections.
- Christmas: Festive mugs with snowflakes, reindeer, or holiday quotes.
- Valentine’s Day: Romantic tumblers with hearts and names.
- Halloween: Spooky designs like pumpkins or “Witch’s Brew” mugs.
- Mother’s/Father’s Day: Personalized “Best Mom/Dad” mugs.
Seasonal products create urgency and give customers a reason to come back throughout the year.
Case Example: Sarah’s Success Story
Sarah, a stay-at-home mom in Manchester, started making mugs as Christmas gifts for her family. She quickly realized people loved them and decided to open an Etsy shop. With just a small sublimation printer and clip art bundles from TumblersGalaxy, she created mugs for teachers, pet owners, and wedding parties.
Within six months, Sarah was earning £2,000 per month from her side business. She credits her success to:
- Focusing on niche audiences (pet owners, teachers).
- Creating seasonal designs for every holiday.
- Using social media videos to show her process.
Sarah’s story proves that with creativity, consistency, and high-quality designs, a mug-making hobby can become a reliable source of income.
9. Tools for Scaling Up
Once you’ve mastered the basics of designing and pressing personalized mugs and tumblers, you might find yourself thinking bigger. Maybe you’ve already sold a few items on Etsy, or perhaps friends keep asking you for custom orders. At this point, you’re ready to scale up. Scaling doesn’t just mean producing more mugs—it means streamlining your workflow, sourcing better materials, and positioning yourself as a professional business. Here are the tools, strategies, and upgrades you’ll need to take your mug-making venture to the next level.

Bulk Buying Blank Mugs and Tumblers
In the early days, it’s fine to buy blank mugs in small packs from craft stores or online shops. But as orders increase, the cost per mug can eat into your profits. The solution is buying in bulk from wholesale suppliers.
- Benefits of bulk buying:
- Lower cost per unit (a $3 mug might drop to $1.50 when bought in bulk).
- Consistent quality across batches.
- Easier inventory management.
- Where to source:
- Local sublimation blank suppliers.
- Online wholesalers like Alibaba or U.S./U.K. craft supply distributors.
- Specialty sublimation retailers (these guarantee mugs are coated properly for sublimation).
👉 Pro Tip: Always order a small test batch first to check coating quality before committing to hundreds of blanks.
Automated Mockup Tools
As you scale, creating product photos for every new design can become time-consuming. That’s where mockup tools save the day. Instead of pressing every single mug for a photoshoot, you can upload your design to a digital mockup and instantly see it on a mug or tumbler.
- Popular mockup tools:
- Placeit.net: Huge library of mug and tumbler mockups.
- Canva Pro: Offers smart mockup features.
- Photoshop Smart Objects: Great for realistic, professional previews.
Mockups are not only faster but also cheaper, allowing you to test multiple designs before investing in actual printing. They’re also essential for Etsy or Shopify product listings, where visuals sell products.
Outsourcing vs. DIY Designs
As your business grows, you’ll need more designs to keep up with customer demand. At this stage, you have two options:
- DIY with Clip Art Bundles: Continue designing your own mugs using professional clip art collections. This is cost-effective, creative, and ensures your products remain unique. TumblersGalaxy’s bundles are perfect for this approach.
- Outsourcing: Hire a freelance designer on platforms like Fiverr or Upwork to create custom graphics. This can save time, but it’s usually more expensive.
👉 The best approach is often a mix: use clip art for general collections and outsource for very specific or branded requests.
Expanding Your Product Line
Scaling up doesn’t mean sticking only to mugs and tumblers. Once you have the equipment, you can expand into related sublimation products such as:
- Tote bags
- T-shirts
- Coasters
- Phone cases
- Keychains
Offering bundles (e.g., a matching mug and tote bag set) increases average order value and gives customers more reasons to buy.
Workflow and Efficiency Tools
Scaling also requires organization and efficiency. Here are a few tools that help:
- Inventory Management Software: Tools like Craftybase or spreadsheets help you track blanks, inks, and shipping supplies.
- Shipping Solutions: Use software like Pirate Ship or ShipStation to automate shipping labels and save on postage.
- Accounting Tools: QuickBooks or Wave help manage finances and keep your business tax-ready.
- Scheduling Software: Tools like Later or Buffer help automate social media marketing so you can focus on production.
When to Upgrade Equipment
At some point, your starter mug press or small sublimation printer won’t keep up with demand. Consider upgrading when:
- You’re making 10+ mugs per day consistently.
- You’re running into downtime waiting for machines to cool/reheat.
- You want to offer larger product lines (like 30 oz tumblers or mass-production runs).
Investing in higher-capacity heat presses and wide-format printers will dramatically increase your output and reduce per-unit costs.
10. FAQs: Everything You Need to Know About Personalized Mugs and Tumblers
Whether you’re just starting your first DIY mug project or considering launching a business, you’ll probably have a few questions. Below are answers to some of the most frequently asked questions about mug and tumbler personalization.
Q1: Do I need sublimation ink, or can I use regular printer ink?
For sublimation printing, you must use sublimation ink. Regular printer ink won’t transfer properly onto mugs, and your designs will look dull or wash off quickly. Sublimation ink is specially designed to turn into gas under heat and bond with the polymer coating on sublimation blanks. If you’re only making vinyl designs with a Cricut, you can use regular ink for cutting templates, but sublimation requires the real thing.
Q2: Are sublimated mugs dishwasher and microwave safe?
Yes, sublimated mugs are both dishwasher- and microwave-safe, provided you use quality blanks and inks. The sublimation process fuses the design into the mug’s surface rather than just sitting on top, which makes the design long-lasting. Vinyl mugs, however, are not typically dishwasher safe unless you seal them with a special coating.
Q3: Can I sell mugs with free clip art I find online?
Usually, no. Free clip art is typically licensed for personal use only, which means you can make a mug for yourself or as a gift but not for resale. To sell mugs legally, you’ll need clip art that comes with a commercial license. At TumblersGalaxy, our Refund & Licensing Policy makes it clear which files can be used for business purposes.
👉 Pro Tip: Always read the license agreement before selling. It protects you and your business.

Q4: What’s the best size template for a mug or tumbler design?
It depends on the mug or tumbler size, but here are some common templates:
- 11 oz mug: 8.5″ × 3.5″ (2,550 × 1,050 pixels at 300 DPI).
- 15 oz mug: 9″ × 4″ (2,700 × 1,200 pixels).
- 20 oz tumbler: 9.3″ × 8.2″ (2,800 × 2,460 pixels).
Always check your blank supplier’s recommendations because sizes can vary slightly.
Q5: How long do sublimated designs last?
With proper care, sublimated designs can last for years. Because the ink bonds with the mug’s coating, the design doesn’t peel, crack, or fade easily. In fact, many sublimated mugs outlast screen-printed or vinyl designs. The key is using high-quality sublimation ink, paper, and blanks.
Q6: Can I use a Cricut instead of sublimation?
Yes—but for vinyl projects, not sublimation. A Cricut or Silhouette machine can cut adhesive vinyl that you apply to mugs manually. This method is great for bold designs, logos, and simple shapes. However, vinyl is less durable than sublimation. It may peel or fade over time, especially with dishwasher use. Cricut mugs are great for gifts and hobby projects, while sublimation is better for professional-quality products.
Q7: Do I need a heat press, or can I use a regular oven?
Technically, you can use a convection oven designed for sublimation with mug wraps, but it’s not as consistent as a mug press. Heat presses provide controlled temperature and pressure, which ensures designs transfer evenly and last longer. If you’re just experimenting, oven wraps are fine, but for business purposes, a dedicated mug press is highly recommended.
Q8: What’s the startup cost for a mug-making business?
It depends on your approach:
- Beginner setup: Around $200–$300 for a basic printer, iron-on transfers, and mugs.
- Professional setup: Around $800–$1,200 for a sublimation printer, mug press, and bulk blanks.
Many small businesses recover their investment within the first few months by selling mugs at $15–$25 each.
Q9: How do I price my mugs for sale?
Consider production costs (mug, ink, paper, packaging) plus your time and profit margin. A standard 11 oz sublimated mug typically costs about $4–$6 to make and sells for $15–$20. Unique or personalized designs can command higher prices, especially for niche markets like weddings or pet lovers.
Q10: Can sublimation be done on any mug or tumbler?
No. Sublimation requires mugs and tumblers with a polymer coating designed to bond with sublimation ink. Standard ceramic mugs won’t work unless coated. For tumblers, stainless steel blanks specifically made for sublimation are widely available.
Bonus Case Study: How Sarah Turned Clip Art into a £2,000/Month Business
When most people think about selling mugs and tumblers, they imagine it as a small craft project or a way to make holiday gifts. But for Sarah, a stay-at-home mom in Manchester, it became much more. What started as a creative hobby quickly transformed into a thriving online business generating over £2,000 per month—all thanks to digital clip art and a little entrepreneurial spirit.
The Beginning: A Hobby with Potential
Sarah had always enjoyed crafting and design. In late 2022, she received a mug press as a Christmas gift and began experimenting with personalizing mugs for her family. Using simple online tools like Canva and clip art bundles she purchased from TumblersGalaxy, she made her first creations—floral mugs for her mother, pet-themed mugs for friends, and festive Christmas tumblers.
The feedback she received was overwhelmingly positive. Her friends kept asking, “Can you make me one too?” That’s when she realized she might be onto something bigger than just a hobby.
Setting Up Shop on Etsy
With encouragement from her friends, Sarah decided to open an Etsy shop. She started small: just ten designs uploaded as digital mockups. At first, she worried about the competition—after all, Etsy is full of custom mug sellers. But she discovered her niche: personalized mugs with watercolor clip art.
Her strategy was simple but effective:
- Focus on specific niches like pet owners, teachers, and weddings.
- Use seasonal designs (Christmas, Valentine’s Day, Mother’s Day) to keep her shop fresh year-round.
- Offer personalization options, such as adding names, initials, or quotes.
Within her first month, she made ten sales. Not life-changing, but it proved the concept worked.
Investing in the Right Tools
After her initial success, Sarah decided to upgrade her setup. She invested around £800 into:
- A sublimation printer for professional-quality prints.
- A better mug press to handle larger orders.
- Bulk blank mugs from a local supplier to reduce costs.
This investment allowed her to produce mugs faster, at higher quality, and with better profit margins. Instead of spending £5–6 per mug, her bulk blanks brought costs down to around £2.50 per mug.
Marketing and Social Media
To drive traffic, Sarah leaned into social media marketing. She created TikTok and Instagram accounts where she posted short videos of her mug-making process. Clips of her pressing a design and revealing the finished mug went viral more than once, leading to spikes in sales.
She also used Pinterest to share lifestyle mockups of her mugs. Pinterest traffic brought in buyers who were searching for seasonal gift ideas, especially during the holidays.
Growth and Scaling
By month six, Sarah had created over 50 designs and built a loyal customer base. Her top sellers included:
- Pet portrait mugs with watercolor clip art.
- Teacher mugs with apple and floral designs.
- Wedding tumblers customized with names and dates.
She consistently earned £2,000 per month in revenue, averaging 100–120 orders monthly. Her profit margin after supplies and fees was around 50%, leaving her with about £1,000 in take-home income—a meaningful contribution to her household budget.
Key Lessons from Sarah’s Success
Sarah’s journey holds important lessons for anyone interested in starting their own mug and tumbler business:
- Find a niche. Instead of targeting everyone, Sarah focused on pet owners, teachers, and wedding gifts. Niches attract loyal buyers.
- Use professional designs. By relying on high-quality clip art bundles from TumblersGalaxy, her mugs looked polished and unique.
- Leverage social media. TikTok and Instagram reels helped her reach customers far beyond Etsy’s organic search.
- Reinvest in tools. Her decision to buy a sublimation printer and bulk blanks dramatically improved her profits.
- Stay seasonal. By updating her shop with holiday designs, she kept customers coming back.
Conclusion: Your Journey from Blank Mug to Creative Business
Over the course of this guide, we’ve explored everything you need to know about creating personalized mugs and tumblers with digital designs. What started as a simple hobby for many crafters has evolved into a booming creative movement—fueling side hustles, online shops, and even full-time businesses around the world.
The reason mugs and tumblers are so popular is clear: they combine practicality, emotional value, and endless creativity. A mug isn’t just something to hold your morning coffee; it can carry a heartfelt message, a treasured memory, or a brand identity. It’s a daily reminder of a special occasion or a loved one, which is why people never stop buying them.
The Journey You’ve Learned
Throughout this guide, we’ve taken a step-by-step look at the entire process:
- Why mugs and tumblers matter: They’re affordable, meaningful, and versatile for both gifts and businesses.
- The tools and materials you’ll need: From beginner setups under £300 to professional sublimation equipment, there’s an entry point for every budget.
- Choosing the right designs: Understanding file formats, DPI, and licensing ensures your final product looks sharp and is legally safe to sell.
- Designing step by step: Setting up your canvas, adding clip art and text, and using mockups to preview your work.
- Printing and transferring: Mastering sublimation and vinyl transfer to bring your digital art to life.
- Creative ideas: From seasonal mugs to pet portraits, weddings, and business branding, there’s no shortage of inspiration.
- Avoiding mistakes: Steering clear of issues like low-res files, misalignment, or poor-quality blanks saves time and money.
- Turning a hobby into income: Platforms like Etsy and Shopify make it easier than ever to monetize your creativity.
- Scaling up: Bulk suppliers, automated mockups, and expanded product lines help you grow.
- FAQs and real-world case studies: Addressing common beginner questions and showing how people like Sarah turned mugs into a reliable income stream.
In other words, you now have a complete roadmap—from designing your very first mug to building a business that could generate thousands each month.
Why Now Is the Perfect Time to Start

The personalized product industry is thriving. Online platforms have made it simple to reach global customers, while social media allows you to market your creations at little to no cost. On top of that, consumers are increasingly drawn to unique, handmade items rather than mass-produced products. This means there has never been a better time to jump in.
Whether you’re looking for:
- A fun weekend project,
- A way to make meaningful gifts, or
- A scalable business opportunity,
personalized mugs and tumblers offer all three.
Your Next Steps
The only thing left is to take action. Start small, experiment with different designs, and don’t be afraid to make mistakes along the way. Each project will teach you something new. With practice, you’ll not only sharpen your skills but also discover what designs resonate most with your audience.
And remember: success doesn’t come from reinventing the wheel—it comes from combining quality tools, professional clip art, and consistent effort.
At TumblersGalaxy, we’re here to help you every step of the way. Our carefully crafted clip art collections are designed to save you time and inspire your creativity, whether you’re making mugs for your family or building a product line for your shop.
👉 Explore our Watercolor Clip Art Collection today and turn your next blank mug into something extraordinary.
The possibilities are endless. Your first design could be the beginning of a brand-new creative journey—or even a business success story like Sarah’s. The only question is: what will you create first?
Leave a Reply